
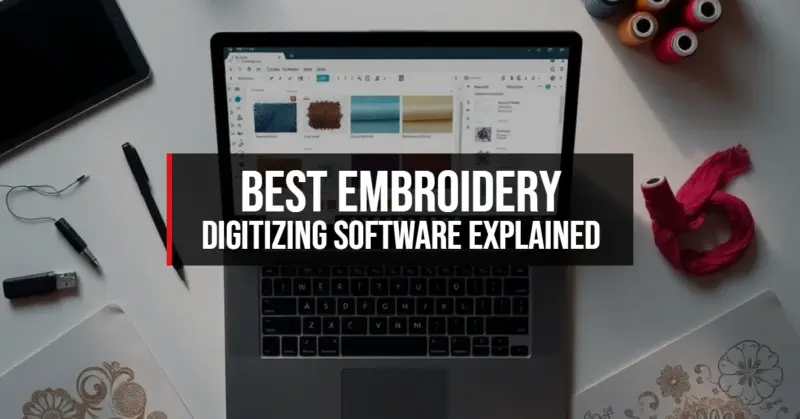
Best Embroidery Digitizing Software Explained
Have you ever wondered how a simple logo becomes a detailed embroidered patch? Embroidery digitizing software turns images into stitchable files your machine can follow. It converts artwork into precise needle movements. Without it, modern embroidery would still rely on hand-traced patterns. This tech is the hidden translator between design and thread.
More people are launching custom apparel brands from home than ever—Etsy sellers, uniform suppliers, gift shops. They all face the same hurdle: turning ideas into flawless stitches. A blurry or poorly spaced design ruins the final product. Tools like embroidery design software, stitch file converter, or digitizing embroidery tools make this process fast and accurate. Even hatch embroidery software and embrilliance embroidery software are evolving to meet rising demand. The right embroidery digitizing software doesn’t just save time—it protects your brand’s quality.
What Is Embroidery Digitizing Software and How Does It Work?

At its core, embroidery digitizing software transforms artwork—like logos, illustrations, or text—into digital stitch files that embroidery machines can understand. Think of it like translating a painting into a language made of tiny needle movements. Without this crucial step, even the most advanced embroidery machine would sit idle, unable to create intricate designs from flat images. Whether you're customizing hats, jackets, or home textiles, this technology bridges the gap between creative vision and physical reality in 2026’s fast-moving apparel and promotional markets.
From Image to Stitch: The Digital Conversion Process
When you upload a logo or graphic into an embroidery design software, the program analyzes shapes, colors, and lines to determine how the needle should move across the fabric. This process involves defining stitch types—such as satin, fill, or running stitches—and setting parameters like density, direction, and underlay. The software essentially maps out every single stitch, calculating where the thread starts, turns, trims, and ends. It's similar to how GPS software plots the most efficient route by breaking down streets and turns, except here, the destination is a beautifully stitched monogram or company emblem.
Advanced tools like Hatch embroidery software and Embrilliance embroidery software go beyond basic tracing. They allow users to manually tweak stitch angles for better texture, add pull compensation to prevent fabric distortion, and simulate how the final design will look on different materials. These simulations save time and materials by catching errors before the needle ever touches fabric. For example, a dense fill stitch might pucker delicate silk, but the software alerts you and suggests a lighter pattern—kind of like a spellchecker for stitching.
- Stitch types: Satin stitches for outlines and borders, fill stitches for large areas, and running stitches for fine details or lightweight fabrics
- Vector support: Most modern vector to stitch program tools accept SVG, AI, or EPS files, preserving clean lines and scalability
- Color sorting: Automatically sequences thread changes to minimize jumps and reduce production time
- Auto-digitizing features: Entry-level programs offer one-click conversion, while pro versions provide full manual control
Why You Can’t Just Use Any Image Editor
While programs like Photoshop or Illustrator are great for designing visuals, they don’t speak the language of embroidery machines. A JPEG or PNG file tells a printer how to lay down ink, but an embroidery machine needs precise coordinates, stitch counts, and thread color changes. That’s where a dedicated digitizing embroidery tool comes in. It converts those pixels into a .PES, .DST, or .JEF file—formats your machine reads like sheet music.
Trying to embroider without proper digitization is like handing a chef a photo of a cake and expecting them to bake it without a recipe. You might get something edible, but it won’t be accurate or efficient. Poorly digitized designs lead to thread breaks, fabric tension issues, and uneven textures. High-end embroidery machine software includes tools like push/pull compensation, which adjusts for how fabric shifts under the needle, ensuring letters don’t warp or overlap. In 2026, with consumers demanding personalized, high-quality goods, precision in this step is non-negotiable.
Top Features to Look for in Modern Embroidery Software

With dozens of options on the market, choosing the right stitch file converter can feel overwhelming. But not all embroidery software is built the same. Some are tailored for hobbyists, while others serve industrial-scale operations. The best picks in 2026 balance user-friendliness with powerful customization, real-time simulation, and seamless compatibility across devices and machines. Knowing which features matter most can save you hours of frustration and thousands in wasted materials.
Real-Time 3D Simulation and Preview Tools
One of the biggest leaps in embroidery software over recent years is the ability to preview designs in 3D before stitching. Instead of guessing how a metallic thread will catch light or how puff embroidery will rise from the fabric, you can rotate and zoom in on a photorealistic model. This feature is especially valuable for businesses creating samples for clients—no more costly test runs just to check texture or alignment.
Programs like Hatch embroidery software offer advanced simulation engines that mimic different fabric types, from cotton twill to stretchy performance wear. You can even adjust lighting to see how the design looks under store fluorescents or outdoor sunlight. For designers working remotely, this means fewer revisions and faster approvals. It’s like having a virtual embroidery studio at your fingertips, reducing both time and waste.
Compatibility and File Format Support
No matter how great your vector to stitch program is, it’s useless if it can’t talk to your machine. In 2026, the industry standard remains broad support for formats like .DST (Tajima), .PES (Brother), .JEF (Janome), and .VP3 (Husqvarna Viking). The best embroidery software doesn’t just read these files—it converts between them seamlessly, making collaboration across brands and regions effortless.
Cloud integration is another growing trend. Many professionals now use web-connected workflows where designs are uploaded, edited, and sent directly to networked machines on the factory floor. This is especially helpful for teams spread across locations or businesses scaling up production. Whether you’re using a home embroidery setup or managing a fleet of industrial heads, ensure your digitizing embroidery tools support both legacy and next-gen file types, including newer formats like .EXP and .XXX.
| Feature | Beginner-Friendly Software | Professional-Grade Software |
|---|---|---|
| Auto-Digitizing | ✔️ One-click conversion | ✔️ With manual override options |
| 3D Simulation | ❌ Basic 2D preview only | ✔️ Real-time, fabric-accurate rendering |
| Stitch Editing | ❌ Limited to color changes | ✔️ Full node-level control |
| File Export Range | ✔️ 5–8 formats | ✔️ 15+ formats, including industrial .DST |
| Cloud Sync | ❌ Manual export required | ✔️ Real-time team collaboration |
How to Choose the Right Embroidery Digitizing Software for Your Needs

Not every stitch file converter is built for every user. The right choice depends on your skill level, volume of work, and long-term goals. In 2026, the market offers solutions ranging from free mobile apps to six-figure enterprise systems. Whether you’re stitching baby onesies in your garage or running a contract embroidery shop, understanding your workflow will guide you to the best fit. Think of it like buying a camera—you wouldn’t get a DSLR if you only post phone selfies, and you wouldn’t shoot a movie on a disposable camera.
Assess Your Skill Level and Workflow
If you're just starting out, look for embroidery design software with intuitive interfaces and guided tutorials. Programs like Embrilliance Express or Brother’s PE Design Plus offer drag-and-drop functionality and pre-made design libraries, letting you focus on creativity instead of technical settings. These tools often include built-in wizards that walk you through converting text or simple logos, making them ideal for crafters and small businesses.
- Identify your primary use: Is it for personal projects, gifts, or selling custom merchandise?
- Check machine compatibility: Does your embroidery machine accept .PES or .JEF files? Confirm before purchasing software.
- Test free trials: Most reputable brands offer 7–14 day trials. Use this to test stability, speed, and ease of learning.
- Consider future growth: Will you need multi-head machine support or batch processing later?
- Look for responsive customer support: Forums, video guides, and live chat can make a huge difference when you're stuck.
Compare Cost vs. Value: One-Time Purchase vs. Subscription
Pricing models have shifted dramatically by 2026. While traditional software like Wilcom or Pulse used to be sold as one-time purchases (often over $1,000), many top tools now operate on subscription plans. For example, Hatch Professional runs around $199/year, giving you continuous updates, cloud storage, and access to new features as they launch. This model benefits users who want to stay current without paying a lump sum.
However, subscriptions aren’t always cheaper in the long run. If you only digitize occasionally, a one-time purchase like Embrilliance Builder ($299) may offer better value. It never expires, works offline, and allows full design editing. The key is to calculate your usage: if you're creating 10+ designs per week, a subscription with advanced tools pays for itself in time saved. But for hobbyists, owning the software outright often makes more sense.
Also, watch out for hidden costs. Some free or low-cost apps lock advanced features behind in-app purchases—like charging extra to remove watermarks or export high-density files. Always read the fine print and check user reviews on independent platforms like Trustpilot or Reddit’s r/embroidery community.
Popular Embroidery Software Options in 2026
The market for embroidery machine software is more diverse than ever, with tools catering to every niche—from home crafters to aerospace textile engineers. Some dominate in usability, others in precision. In 2026, the top contenders balance innovation, reliability, and community support. Below is a breakdown of the most trusted names and what sets them apart in real-world use.
Hatch Embroidery Software: Best for Growing Businesses
Hatch embroidery software has become a go-to for small to mid-sized businesses thanks to its clean interface and scalable features. Developed by the team behind Wilcom, it brings enterprise-level power to a more affordable price point. Hatch Essentials covers basic digitizing needs, while Hatch Creator and Professional add advanced tools like multi-format editing, network licensing, and integration with e-commerce platforms.
One standout feature is its “Design Suite” layout, which organizes tools into logical panels—digitizing, lettering, editing, and output—so users aren’t overwhelmed. It also supports direct uploads to platforms like Etsy or Shopify, letting craft entrepreneurs automate custom order fulfillment. For users upgrading from basic machine-native software, Hatch offers a smooth learning curve without sacrificing control.
Embrilliance Software Suite: Ideal for Hobbyists and Crafters
Embrilliance embroidery software takes a modular approach, letting users buy only the components they need. For example, “My Editor” handles design changes, “FontFuser” combines lettering styles, and “MonogramWizard” simplifies personalized gifts. This à la carte model is perfect for those who don’t need full digitizing but want more than what their machine provides.
It’s especially popular among quilters and scrapbookers who incorporate embroidery into mixed-media projects. Since it runs natively on Windows and macOS (and even some tablets), it’s flexible for mobile creators. While it lacks auto-digitizing in most modules, its precision editing tools are praised for fine-tuning existing designs—like adjusting spacing in monograms or resizing elements without distortion.
Common Challenges and How to Avoid Them
Even with the best digitizing embroidery tools, users run into issues—especially when learning. Misaligned designs, thread breaks, and file corruption can derail projects and frustrate beginners. But most problems aren’t flaws in the software; they stem from misunderstandings about workflow, settings, or machine limits. The good news? Nearly all are preventable with the right knowledge.
Managing Design Complexity and Stitch Count
One of the most common mistakes is overloading a design with too many stitches. A dense, detailed logo might look impressive on screen, but in reality, it can weigh down fabric, cause puckering, or exceed your machine’s maximum stitch count. Most home embroidery machines in 2026 cap out around 100,000–150,000 stitches per design, while commercial units can handle over 1 million.
To avoid overflow, use your stitch file converter’s stitch count estimator early in the design process. Simplify complex images by reducing detail or splitting large designs into segments. Also, consider the fabric: a 50,000-stitch design might work on denim but destroy a lightweight scarf. Think of stitch count like calories in a meal—too much, and the system can’t handle it.
Dealing with File Compatibility and Transfer Errors
Another frequent headache is sending a file to the machine only to find it won’t read. This usually happens due to incorrect format export, unsupported characters in filenames, or corrupted USB transfers. Always double-check that you’ve exported in the correct format for your brand and model. For example, a .PES file for a Brother machine won’t work on a Tajima industrial head, which needs .DST.
To prevent errors, adopt a naming convention that avoids spaces and special characters (use underscores instead). Also, format your USB drives to FAT32, the most universally accepted file system. If your embroidery software supports it, use QR code sharing or Wi-Fi transfer to skip physical drives altogether. Many 2026 machines now support direct wireless sync from apps like Hatch or Embrilliance, cutting out the middleman and reducing failure points.
More Information
What is the best embroidery design software for beginners?
Many beginners find Hatch embroidery software user-friendly because it offers guided tools and clear interfaces. It’s a solid choice among digitizing embroidery tools to learn how to turn simple ideas into stitchable designs.
How can I convert a vector image into an embroidery file?
A vector to stitch program like Embrilliance can transform logos or illustrations into embroidery formats like .pes or .dst. These tools help ensure clean stitch patterns by accurately interpreting vector paths.
Can I use embroidery machine software on a Mac?
Yes, several embroidery software options, including certain versions of Hatch and Embrilliance, are compatible with Mac systems. Always check system requirements to ensure your digitizing embroidery tools will run smoothly.
What does a stitch file converter do?
A stitch file converter allows you to change embroidery files from one format to another, so they work with different machines. It’s a handy feature often built into broader embroidery software suites.
Leave a Reply