
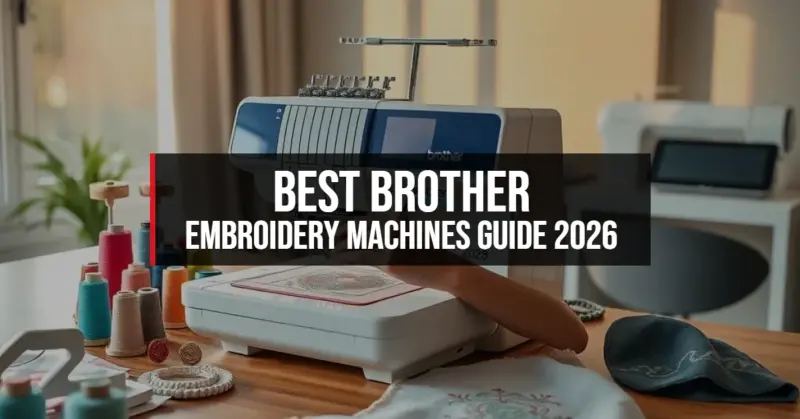
Best Brother Embroidery Machines Guide
Like a symphony conductor guiding each instrument into harmony, a brother embroidery machine orchestrates threads, needles, and digital cues to compose fabric art with precision. What looks like magic—stitches forming intricate patterns from thin air—is in fact meticulous engineering, turning static cloth into a living canvas, one automated movement at a time.
Viewing it not just as a tool but as a creative partner transforms how we approach embroidery. Whether it's a machine embroidery Brother unit for beginners or a digital embroidery machine for custom hat embroidery machine projects, the fusion of technology and craft empowers expression. From embroidery machine and sewing combos to intricate machine embroidery embroidery designs, the Brother stitch machine redefines what’s possible in modern textile art.
Why Choose a Brother Embroidery Machine for Your Creative Projects?

The brother embroidery machine has become a top choice for crafters, small business owners, and hobbyists who want precision, speed, and versatility in their textile work. Known for blending advanced technology with user-friendly design, these machines cater to both experienced stitchers and those just stepping into the world of machine embroidery. Whether you're crafting personalized gifts, custom apparel, or intricate home décor, a Brother embroidery machine offers the reliability and digital integration needed to bring detailed designs to life with minimal frustration.
Unmatched Versatility in One Device
Modern Brother models are more than just embroidery tools — they’re hybrid powerhouses that combine sewing and embroidery in a single unit. This dual functionality makes the embroidery sewing machine ideal for users who want to switch seamlessly between constructing garments and embellishing them with custom patterns. From monograms on baby clothes to elaborate floral motifs on quilts, these machines handle diverse fabric types and design complexities with ease. The built-in USB ports and Wi-Fi connectivity on select models allow direct transfer of digital embroidery files, eliminating the need for external devices.
Many users appreciate the ability to preview designs on a large LCD screen before stitching. This feature reduces errors and material waste, especially when working with delicate or expensive fabrics. With automatic thread tension, needle threading systems, and intuitive navigation menus, even complex projects feel manageable. The integration of smart sensors helps detect issues like broken threads or low bobbin levels, pausing the machine to prevent ruined work — a critical advantage for multitaskers and beginners alike.
- Dual-function design: Combines embroidery and sewing in one compact unit, maximizing workspace efficiency
- Adjustable speed settings: Lets users control stitch precision, especially helpful for intricate machine embroidery designs
- Expandable memory: Stores dozens of built-in designs and supports additional downloads via USB or cloud
- Automatic bobbin winding: Frees up hands during prep and reduces setup time between projects
Designed for Every Skill Level
One of the standout features of a machine embroidery Brother model is its accessibility. Unlike industrial-grade equipment that demands technical expertise, Brother has engineered its lineup to welcome newcomers without sacrificing performance for professionals. The PR series, for example, includes guided tutorials and on-screen prompts that walk users through hooping, threading, and design selection. These interactive aids transform what could be an intimidating process into a smooth, educational experience.
For seasoned embroiderers, advanced customization options are readily available. You can resize, rotate, mirror, and combine designs directly on the machine, or use Brother’s PE Design software to create original artwork. The software supports file formats like .PES, .DST, and .JEF, ensuring compatibility with third-party design libraries. This flexibility is invaluable for entrepreneurs selling custom patches or personalized hats — where unique branding separates their products in a crowded market. With proper care, these machines maintain consistent stitch quality for thousands of hours, making them a long-term investment.
How to Compare Brother Embroidery Machine Models in 2026

With over a dozen active models in the Brother lineup, selecting the right computerized embroidery machine requires understanding key specifications and how they align with your project goals. Prices range from under $500 for entry-level units to over $3,000 for high-end models with multi-needle capabilities. The decision hinges on factors like embroidery area size, number of built-in designs, connectivity options, and whether you need a dedicated embroidery-only machine or a combo unit.
Top Models and Their Best-Use Cases
In 2026, the Brother SE1900 remains one of the most popular all-in-one choices, praised for its balance of sewing power and embroidery precision. It features a 4" x 4" embroidery field, 138 built-in stitches, and 108 alphabet styles — making it ideal for crafters who frequently switch between functions. Meanwhile, the Brother PE800 stands out as a pure embroidery machine with a 5" x 7" hoop capacity, over 130 built-in designs, and a fast 800 stitches-per-minute speed. It’s a favorite among those creating larger motifs or running small-scale custom orders.
For commercial applications, the Brother PR1055X delivers industrial-level performance with ten needles and automatic thread trimming. Though priced higher, it drastically reduces production time for businesses doing high-volume hat embroidery or uniform customization. On the beginner side, the Brother XM2701 offers an affordable entry point with basic embroidery capabilities, though it lacks some of the digital features found in pricier models. Each machine targets a specific niche, so matching the specs to your workflow is essential.
Key Features to Evaluate Before Buying
When comparing digital embroidery machine options, focus on measurable attributes that impact daily use. The embroidery field size determines the maximum design dimensions without re-hooping — critical for large logos or full-front hat designs. Stitch speed, measured in stitches per minute (SPM), affects productivity; home users may find 600–800 SPM sufficient, while pros often require 1,000+ SPM.
Connectivity is another major differentiator. Wi-Fi-enabled models like the Brother LB6800 allow direct download of designs from online marketplaces or cloud storage, while older units rely on USB transfers. Touchscreen interfaces enhance navigation, especially when editing designs on the fly. Additional features like automatic thread cutters, built-in tutorials, and needle threaders contribute to user comfort and efficiency. Always check warranty terms and customer support availability, as these reflect long-term reliability and service access.
| Model | Type | Max Speed (SPM) | Embroidery Area | Connectivity | Price Range (2026) |
|---|---|---|---|---|---|
| Brother SE1900 | Embroidery and sewing | 820 | 4" x 4" | USB | $599–$699 |
| Brother PE800 | Dedicated embroidery | 800 | 5" x 7" | Wi-Fi, USB | $799–$899 |
| Brother LB6800 | Embroidery machine for beginners | 710 | 4" x 4" | Wi-Fi, USB | $499–$549 |
| Brother PR1055X | Multi-needle commercial | 1,050 | 8" x 12" | USB, LAN | $2,800–$3,200 |
| Brother XM2701 | Basic combo | 710 | 3.2" x 3.2" | None (manual input) | $299–$349 |
Step-by-Step Guide to Using a Brother Embroidery Machine for the First Time

Setting up a Brother stitch machine for the first time can feel overwhelming, but following a structured process ensures smooth operation and prevents avoidable mistakes. Most issues beginners face — such as tangled threads, misaligned designs, or skipped stitches — stem from incorrect setup rather than machine defects. By mastering the foundational steps, you’ll build confidence and produce professional-looking results from your earliest projects.
Unboxing and Initial Setup
Begin by placing the machine on a sturdy, level surface with ample lighting and space for the arm to rotate freely. Remove all protective tapes, foam inserts, and shipping bolts — these are often overlooked but critical for safe operation. Consult the manual to locate the power switch, thread tension dial, and bobbin winder. Plug in the machine and turn it on to verify the display lights up and responds to touch (if applicable).
- Install the embroidery unit if it’s a combo model — this usually slides into place on the right side of the sewing bed
- Wind the bobbin using the automatic winder, ensuring the thread passes through the tension disc correctly
- Insert the bobbin into the case with the thread unwinding in the correct direction (usually counterclockwise)
- Thread the upper needle following the color-coded path marked on the machine
- Engage the automatic needle threader if available, or thread manually using the included tool
- Perform a test run without fabric to confirm both needle and hook are moving smoothly
Creating Your First Embroidery Project
Once the machine is threaded, the next step is hooping the fabric securely. Choose the correct hoop size for your design — using a hoop larger than necessary can cause fabric shifting, while a too-small hoop won’t accommodate the design. Place the stabilizer beneath the fabric, then clamp it tightly in the hoop, ensuring no wrinkles or slack. Attach the hoop to the machine’s carriage, aligning the pins correctly to avoid misregistration.
On the touchscreen, select a built-in design or import one via USB. Preview the design to confirm placement and size. Lower the presser foot and press the start button. The machine will begin with a tack stitch to secure the fabric, followed by the main design. Monitor the first few minutes closely — if the thread bunches or the fabric puckers, stop immediately and check hooping tension or stabilizer type. After completion, trim excess threads and remove the hoop. Gently tear away cutaway stabilizer or wash away soluble types if used. This process, repeated with care, builds the foundation for more complex machine embroidery embroidery designs in the future.
Maximizing Longevity and Performance of Your Embroidery Machine and Sewing Combo
A well-maintained embroidery machine and sewing unit can last over a decade, even with regular use. However, neglecting routine care leads to skipped stitches, increased noise, and eventual mechanical failure. Dust, lint, and dried thread oils accumulate in the bobbin area and feed dogs, interfering with smooth operation. Brother recommends cleaning after every 8–10 hours of use, especially when switching between thread types or colors.
Daily and Monthly Maintenance Checklist
After each session, unplug the machine and use the included brush to remove lint from around the needle bar, bobbin case, and hook race. Wipe the exterior with a soft, dry cloth — never use solvents or water-based cleaners. Periodically check the needle for burrs or bending; replace it after 6–8 hours of continuous stitching or at the start of each new project. A dull needle causes fraying, poor tension, and fabric damage.
Monthly maintenance includes lubrication of specified moving parts (if your model requires it — many modern machines are pre-lubricated), inspecting the belt tension, and calibrating the needle-to-hook timing. Use only Brother-recommended oil to avoid attracting dust. If the machine feels sluggish or makes unusual noises, consult the troubleshooting guide before disassembling any parts. Keeping a log of service dates and issues helps track performance trends and identify recurring problems early.
- Use quality thread: Inferior threads shed lint and break easily, increasing maintenance needs
- Store properly: Cover the machine when not in use to prevent dust buildup and UV damage
- Update firmware: Wi-Fi models receive performance patches and new features via automatic updates
- Use correct stabilizers: Matching stabilizer type (cutaway, tearaway, washaway) to fabric prevents shifting and puckering
Troubleshooting Common Issues
Even the most reliable hat embroidery machine may encounter glitches. Thread breaking is often caused by incorrect tension, a dull needle, or improper threading. Re-thread the machine from scratch, ensuring the thread seats fully in the tension discs. If the design shifts mid-stitch, recheck hoop tightness and stabilizer adhesion. For machines that skip stitches, verify the needle is inserted correctly (flat side facing back) and hasn’t been bent during previous use.
When the machine fails to read USB files, confirm the design format is supported (.PES is standard for Brother). Reformat the USB drive to FAT32 and avoid deeply nested folders. If Wi-Fi connection drops, restart the router and re-pair the device through the settings menu. For persistent errors, note the error code (e.g., “E6” for motor overload) and consult Brother’s official support site, which includes video guides and live chat options. Proactive care and informed troubleshooting keep your digital embroidery machine running at peak efficiency for years.
More Information
What should I look for when choosing an embroidery sewing machine for home use?
Look for user-friendly features like a color touchscreen and built-in tutorials, especially if you're using a machine embroidery Brother for the first time. Models that combine embroidery and sewing functions offer versatility for creative projects.
Can a digital embroidery machine handle hat designs effectively?
Yes, a hat embroidery machine is designed with a cylindrical hoop to fit curved surfaces like caps, ensuring precise stitching. Many computerized embroidery machine models from Brother include this capability out of the box.
Are Brother stitch machines suitable for beginners?
Absolutely, a Brother stitch machine often comes with guided setups and preset stitches, making it ideal for beginners. The intuitive interface helps new users dive into machine embroidery designs without frustration.
How do I transfer machine embroidery embroidery designs to my computerized embroidery machine?
Most digital embroidery machines support USB drives or Wi-Fi to import designs directly into the system. Always ensure your embroidery machine and sewing combo is compatible with common file formats like .PES or .DST.
Leave a Reply