
What Is Punch Needle Embroidery and How It Works

Many crafters search for a creative outlet that feels both relaxing and rewarding. Yet, few realize how tricky it can be to find one that’s simple to start but still delivers stunning results. punch needle embroidery looks easy—just push thread through fabric, right? But uneven loops, tangled yarn, and fabric tension issues quickly turn excitement into frustration. The tools seem straightforward, but the rhythm? That’s harder to master.
What if bringing texture and color to fabric could feel natural, almost intuitive? The beauty of punch needle craft lies in its forgiving nature—mistakes blend into the design, and progress shows with every stitch. Thread painting with an embroidery punch tool isn’t about perfection. It’s about motion, rhythm, and the quiet joy of watching wool bloom through cloth. Needle punching turns patience into pattern, one loop at a time.
- What Is Punch Needle Embroidery and Why Is Everyone Obsessed in 2026?
- Getting Started: Essential Tools and Materials for Your First Project
- Step-by-Step Guide: Creating Your First Punch Needle Embroidery Project
- Creative Applications: From Wall Art to Wearables in 2026
- Troubleshooting and Pro Tips from 2026’s Top Crafters
- More Information
What Is Punch Needle Embroidery and Why Is Everyone Obsessed in 2026?
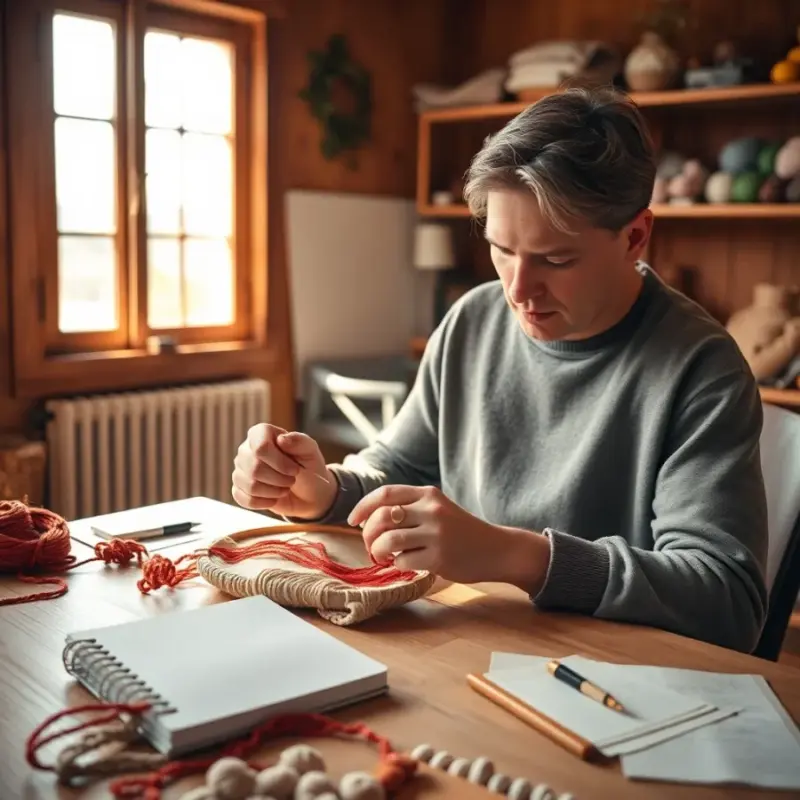
Have you seen those lush, textured designs that look like tiny woven rugs blooming from fabric? Chances are, you’ve stumbled upon the magic of punch needle embroidery. This craft has exploded in popularity, and for good reason — it’s fast, forgiving, and creates stunning results even for beginners. Unlike traditional embroidery that relies on surface stitches, this technique uses a special tool to push thread or yarn through fabric, forming a dense row of loops. The result? A plush, almost carpet-like surface that feels as good as it looks. Whether you call it thread painting, needle punching, or yarn embroidery, the process is hypnotic — each punch builds a rhythm, and before you know it, a full design emerges in minutes.
How Does the Embroidery Punch Tool Work?
The secret lies in a clever little gadget called the punch needle. It’s not your grandma’s embroidery needle — this hollow tool has a slit near the tip that grabs the thread, then releases it as you pull up, leaving a loop on the backside of the fabric. When used consistently across a pattern, these loops form a continuous, raised surface. The beauty of the embroidery punch tool is its simplicity: you don’t flip the fabric, you don’t knot threads, and you don’t stitch backward. Just punch down, lift, move over — repeat. The motion becomes meditative, almost like drawing with yarn.
There are two main types of punch needles: adjustable and fixed gauge. The adjustable ones let you change the loop height, giving you control over texture — perfect for 3D effects or gradient work. Fixed gauge needles, on the other hand, are beginner-friendly and deliver consistent results. Whether you’re using cotton floss for delicate details or bulky wool for cozy wall hangings, the tool adapts beautifully. And with brands innovating every year, modern versions in 2026 offer ergonomic grips, smoother finishes, and even magnetic thread guides to reduce tangles.
- Loop formation: The punch needle creates loops on the back of the fabric, not knots — this is what gives the signature texture
- One-way stitching: You only work from the front, eliminating the need to turn your hoop constantly
- Speed advantage: Projects that take hours with traditional embroidery can be finished in under an hour
- Versatility: Works with cotton, wool, acrylic, and even metallic threads for dazzling effects
Thread Painting vs. Traditional Embroidery: What’s the Difference?
If you’ve dabbled in cross-stitch or satin stitch, you might wonder how punch needle craft stands apart. The most obvious difference? Texture. Traditional embroidery lies flat; thread painting builds up. Where satin stitch fills a shape with smooth, tight lines, needle punching floods it with soft loops that catch the light differently. This makes punch needle ideal for organic shapes — think fluffy clouds, rolling hills, or a pet’s fur. It’s not about precision edges; it’s about dimension and warmth.
Another game-changer is the learning curve. While traditional embroidery requires mastering multiple stitches, punch needle uses just one motion. That doesn’t mean it’s “easier” — it’s different. There’s a rhythm to it, a feel you develop over time. Mistakes are easy to fix by simply pulling out a few loops. And because the design is built from continuous lines, you’re less likely to run out of thread mid-stitch or miscount patterns. In 2026, many crafters are switching to yarn embroidery not just for speed, but for its therapeutic flow — it’s like knitting with a needle, but on fabric.
Getting Started: Essential Tools and Materials for Your First Project

Ready to dive into needle punching? The good news is you don’t need a craft room full of supplies. A few key tools, and you’re set. The core of your toolkit is, of course, the punch needle craft tool itself. But choosing the right one depends on what you want to create. Are you making a delicate coaster or a chunky wall tapestry? The answer determines your needle size, fabric, and thread. Let’s break it down so you start strong — no frustration, just creativity.
Choosing the Right Punch Needle and Hoop
Your punch needle should match your thread weight. For fine threads like embroidery floss, go for a #10 or #12 needle. These produce tight, detailed loops perfect for portraits or intricate florals. If you’re dreaming of cozy, textured wall art, a #8 or #6 needle paired with bulky yarn is your best bet. These larger gauges create dramatic loops that stand tall and proud. Some crafters even use dual-tip needles in 2026 that allow quick switching between fine and thick threads without changing tools.
Equally important is your embroidery hoop. Unlike regular hoops, punch needle requires a tight, drum-like tension. The fabric must stay taut to prevent skipped loops or fabric tearing. A wooden or plastic inner/outer ring combo works, but many artists now swear by scroll frames or Q-snap frames. These keep tension consistent across large pieces and reduce hand fatigue. Pro tip: wrap the outer hoop in tape or fabric to prevent slippage — nothing kills momentum like a wobbly hoop.
Best Fabrics and Threads for Yarn Embroidery Success
Not all fabrics can handle the punch. You need something sturdy enough to withstand repeated piercing but open enough for the needle to glide through. Monk’s cloth is the gold standard — its loose weave is perfect for beginner punch needle embroidery. It’s affordable, widely available, and forgiving. Evenweave and linen are excellent for finer work, especially when using embroidery floss. Avoid tightly woven cotton or stretchy knits — they either resist the needle or distort under pressure.
Thread choice is where the fun begins. Embroidery floss gives crisp detail and is ideal for small projects. But if you’re after that plush, rug-like feel, go for worsted weight or bulky yarn. Acrylic is budget-friendly; wool brings warmth and depth. In 2026, eco-conscious crafters are embracing organic cotton and recycled yarns, blending sustainability with style. And don’t sleep on variegated threads — they add automatic gradients to your design, making sunsets and oceans come alive with zero extra effort.
| Material | Best For | Thread Compatibility | Beginner-Friendly? |
|---|---|---|---|
| Monk’s Cloth | General punch needle craft, wall art, coasters | Worsted yarn, embroidery floss | Yes — highly recommended |
| Evenweave (25-count) | Detailed portraits, small designs | Embroidery floss, pearl cotton | Moderate — requires precision |
| Linen | Elegant home decor, fine art pieces | Fine threads, silk | No — advanced level |
| Aida Cloth (14-count) | Not recommended — too stiff | Poor thread glide | No |
| Burlap | Rustic decor, seasonal crafts | Bulky yarn, jute | Yes — but frays easily |
Step-by-Step Guide: Creating Your First Punch Needle Embroidery Project

There’s nothing quite like the thrill of making your first loop. With the right setup and a clear plan, you’ll be crafting in no time. The process is intuitive, but a few key steps make all the difference between a polished piece and a tangled mess. Whether you’re creating a heartfelt gift or decorating your living room, this guide will walk you through the essentials of needle punching with confidence. Let’s get those hands moving!
Preparing Your Fabric and Transferring the Design
Start by cutting your fabric about 3–4 inches larger than your hoop. This gives you room to grip and re-stretch if needed. Soak monk’s cloth before use if it’s pre-shrunk — this prevents puckering later. Once dry, center it in your hoop and tighten the screw until the surface feels like a drum. You shouldn’t be able to wiggle the fabric at all.
- Print or draw your design on paper — keep it simple for your first try (hearts, stars, or basic animals work great)
- Place the paper under the fabric and trace with a water-soluble pen or chalk pencil
- For complex patterns, use transfer paper or a lightbox to ensure accuracy
- Double-check your lines — once you start punching, corrections get tricky
Mastering the Punch: Technique and Common Mistakes
The magic happens in your wrist. Hold the punch needle like a pencil, with a relaxed grip. Position the tip just behind your traced line, press straight down until the shoulder of the needle touches the fabric, then lift — don’t drag. Each punch should be vertical and consistent. Move to the next spot, leaving no gaps. Think of it like coloring with a pen, but in reverse: you’re building from the inside out.
One of the most common mistakes? Tilting the needle. This causes uneven loops or skipped stitches. Another pitfall is pulling the needle too high between punches — keep it close to the fabric for better control. And don’t rush! Speed comes with practice. If your loops start to pull through to the front, your fabric might be too loose or your needle too large. On the flip side, if the needle won’t penetrate, your thread may be too thick or your fabric too tight.
- Consistent depth: Always punch to the same depth for uniform loops
- Direction matters: Work in one direction (usually top to bottom) to avoid overlapping loops
- Thread tension: Don’t pull too hard — let the needle do the work
- Backside check: Flip your hoop occasionally to inspect loop formation
Creative Applications: From Wall Art to Wearables in 2026
Once you’ve mastered the basics, the real fun begins: applying your yarn embroidery skills to real-life projects. This isn’t just a craft — it’s a design movement. In 2026, punch needle art is everywhere: on denim jackets, cushion covers, greeting cards, and even wedding decor. Its versatility makes it a favorite among DIYers, small businesses, and interior designers alike. The texture adds instant coziness to any space, and the personal touch turns ordinary items into heirlooms.
Home Decor and Textile Art
Wall hangings are the crown jewels of punch needle craft. A single 8x10 inch piece can transform a blank wall into a focal point. Try a minimalist mountain scene in gray yarn, or a vibrant sunflower in golden threads. Pair it with a reclaimed wood frame for that modern-rustic vibe. Coasters and placemats are also popular — durable, washable, and endlessly customizable for holidays or family themes.
For larger projects, consider punch needle rugs. Yes — real floor rugs! Using a rug punch needle and burlap or rug canvas, crafters are making durable, washable floor art. These aren’t just novelties; they’re functional pieces that withstand foot traffic. In 2026, eco-studios are selling punch needle floor mats as sustainable alternatives to mass-produced decor, each one telling a story through color and texture.
Fashion and Personalized Gifts
Imagine a denim jacket with a blooming rose garden on the back — that’s the power of thread painting in fashion. Punch needle adds dimension to clothing without the stiffness of iron-on patches. Use medium-weight yarn on sturdy denim or canvas, and secure the back with fabric glue to prevent snagging. Hats, tote bags, and sneakers are also getting the treatment.
As for gifts, nothing says “I made this just for you” like a custom punch needle portrait. Pet lovers adore embroidered likenesses of their dogs or cats. New parents cherish baby’s first name stitched in soft pastel loops. And in 2026, digital marketplaces are buzzing with personalized punch needle art, from anniversary dates to song lyrics rendered in flowing script. It’s more than a craft — it’s a way to weave emotion into fabric.
Troubleshooting and Pro Tips from 2026’s Top Crafters
Even seasoned artists hit snags. But here’s the good news: most punch needle issues are fixable, and often preventable. The key is knowing what to watch for and how to adapt. Whether you’re battling loose threads or uneven spacing, the embroidery punch tool community in 2026 has shared countless hacks to elevate your work. Let’s dive into the most common challenges and how to conquer them like a pro.
Fixing Loose Loops and Thread Pull-Through
If loops are popping to the front or unraveling, your fabric tension is likely the culprit. Re-tighten your hoop — it’s the first line of defense. Another trick: after finishing a section, dab the back with fabric glue (like Aleene’s). This locks everything in place without stiffening the front. For extra security on wearables, back the entire piece with iron-on interfacing.
Thread thickness also plays a role. Too thick for your needle? It won’t feed smoothly. Too thin? It may not form proper loops. Always test on a scrap first. And when starting a new thread, leave a 2-inch tail at the back — don’t knot it. The surrounding loops will hold it securely.
How to Blend Colors and Create Depth
Want your sunset to glow or your cat’s fur to look realistic? Layering is your secret weapon. Use two shades of the same color in adjacent rows — the eye blends them naturally. For gradients, gradually shift from dark to light yarn across a shape. Some artists even twist two threads together for custom hues.
Another pro move: vary loop height. Adjustable punch needles let you mix short, dense loops with taller, looser ones. This creates shadows and highlights — perfect for petals, feathers, or water ripples. In 2026, advanced crafters are combining punch needle with hand embroidery for mixed-media magic, adding French knots or chain stitches for detail.
- Test swatches: Always practice on scrap fabric before starting a big project
- Keep a journal: Note needle size, thread, and fabric combos that work well
- Lighting matters: Work under bright, natural-feeling light to spot mistakes early
- Clean your needle: Wipe it with rubbing alcohol if thread starts to stick
More Information
What is punch needle embroidery and how does it work?
It’s a creative textile technique where you use an embroidery punch tool to push thread or yarn through fabric, creating dense, looped stitches. This method, also known as needle punching, results in a textured, rug-like design that’s both bold and satisfying to make.
Can I use regular embroidery floss for punch needle projects?
Absolutely! While yarn is common in yarn embroidery, you can use stranded cotton floss—just make sure it’s the right thickness for your needle’s eye. Using the proper gauge ensures smooth stitching and prevents thread breakage during your punch needle craft.
Is punch needle embroidery suitable for beginners?
Definitely! This thread painting technique is beginner-friendly with a little practice. The tools are simple, and many find the rhythm of needle punching calming and intuitive, making it a popular entry point into fiber arts.
What fabrics work best for punch needle embroidery?
Monk’s cloth, linen, and rug warp are ideal because they’re tightly woven and hold the loops securely. These fabrics stand up well to punch needle craft and prevent the threads from pulling through, ensuring your embroidery punch tool performs flawlessly.
Leave a Reply